
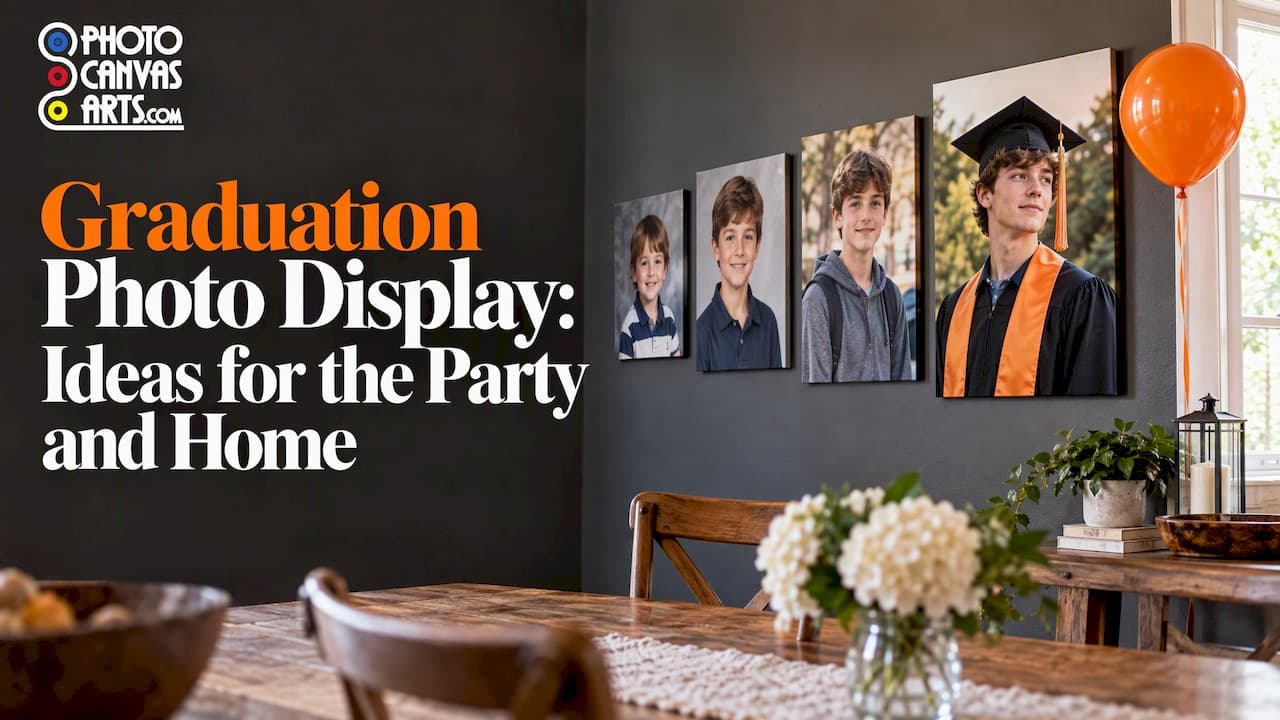
The best graduation photo display tells a short story, sits where guests already gather, and doesn't damage your walls or your original photos. Pick one anchor piece (a large canvas or a photo wall), add a timeline that walks from the first day of school to the last, and keep the small keepsakes on a table. Below you'll find ideas for the party day, a plan for keeping the display afterward, and the practical details most guides skip: mounting, lighting and print choices.
TL;DR
- Build one focal point (a big canvas or a gallery-style wall) and let smaller photos support it, instead of spreading 80 snapshots everywhere.
- Organize the photos by life stage, such as preschool, elementary, middle school, high school and college, so guests can follow the story at a glance.
- Use reusable putty or removable strips only after a test spot, and keep string lights plugged directly into wall outlets.
- Print copies for display and store the originals safely in boxes.
- Choose the finish for the room: canvas for a warm, frameless look, paper for a framed gallery wall.
Table of Contents
- Start with the story, not the photos
- Where to put the display at the party
- Party display ideas that actually work
- A graduation photo wall at home
- Canvas or paper: choosing the print
- Mounting photos without damaging walls or photos
- Lights and décor: keep it safe
- Protecting the original photos
- Our perspective: one big piece beats fifty small ones
- Turn your favorite photo into a canvas or print
- Graduation photo gifts that keep the memories
- A simple timeline for planning
- FAQ
- Sources
Start with the story, not the photos
Before you pin anything, decide what the display says. A graduate's party usually needs one of three stories: the whole life so far, the school years only, or the graduate's passion (a sport, an instrument, a lab, a stage).
Then sort the photos into stages. A simple structure is birth and preschool, elementary, middle school, high school, and then college or what comes next. Each stage gets a small group of photos, ideally with one first-day-of-school picture and a line or two about what happened that year. That "eras" approach is a standard suggestion in party-planning guides, and it works because guests read a display in about the time it takes to hold a plate.
A useful rule: pick 8 to 12 photos per stage at most, and one hero image per stage. If you can't choose, let the graduate cut the final list. They usually pick better than the family does.
Where to put the display at the party
Place photos where people already stand: near the entrance, beside the food table, and close to where the graduate will sit or mingle. You want guests to look while they wait, not make a special trip.
- Entryway: this is your anchor spot. A large canvas or a welcome sign with a senior portrait sets the tone as people arrive.
- Food or dessert table: people linger here, so this is the place for smaller frames, a photo garland or a memory table.
- Graduate's seat or photo corner: a themed print, such as one photo from each season of a sport or activity, makes good conversation material.
If you're hosting outdoors, think about wind and sun. Lightweight paper photos curl in direct sun, and clips on a breezy fence line will fly. Frames, canvas and boards on easels hold up better.
Party display ideas that actually work
A sidewalk timeline
Line the approach to the house with large school photos, one per year, each with a year sign, a graduation-cap sign or a balloon. Party City's DIY guide describes this timeline, and it's a good way to turn the walk to the door into the first chapter of the story. Mount the photos on foam board or a sturdy stake, and bring them in if rain is forecast.
Photos on string lights
Clip photos in chronological order on a strand of string lights across a wall or the ceiling line. It's inexpensive and flexible, and it gives you a place for the smaller snapshots that wouldn't deserve a frame. See the lighting safety notes below before you plug anything in.
A memory table
A table with a few framed photos, a yearbook, the first report card, a favorite jersey or a tassel gives guests something to touch and talk about. Keep photos upright on small easels and put anything fragile or irreplaceable out of reach of spills.

Photo boards and poster collages
Three panel boards, one per school stage, are still the classic format. Mix sizes: a few 5x7 prints around one or two 8x10s feels designed, while twenty identical 4x6s feels like a wall of snapshots. Print copies, not originals, because glue and pins are forever.
Balloons, garlands and décor
Lightweight photos can hang from ribbons or balloons, which suits an outdoor party or a backyard. Keep photos small and light so balloons can carry them, and don't rely on this for anything you couldn't replace.
A themed gallery print and a slideshow
One neat idea is a single print showing one photo from each year of a sport or activity, such as a swimmer at age 6, 9, 12, 15 and 18. A short slideshow with music playing on a TV or laptop in the background is another way to show more photos than the walls can hold. Keep it to a few minutes so it loops without becoming noise.
Rotate during the party
If you have a big photo collection, swap a few pictures partway through the party, for example moving from elementary shots to college-era ones. It's a small step that gives repeat visitors something new to look at.
A graduation photo wall at home
A party display is temporary. A photo wall is what stays. Better Homes & Gardens notes that a gallery wall can show family photography as either a formal grid or an organic grouping, and that mixing photo sizes and frames makes the arrangement more dynamic. Both work for a graduate.
Grid: best for matching frames and photos of the same style, such as a row of school portraits. It looks calm and deliberate, and it suits an office or a hallway.
Organic grouping: best when you mix candid shots, certificates, a diploma frame and a canvas. It feels personal and handles different shapes well.
A simple way to plan it:
- Cut paper templates in the size of each print and tape them to the wall.
- Move them around until the center of the group sits at about eye level.
- Keep the gaps between pieces consistent, usually 2 to 3 inches.
- Put the biggest or most meaningful piece slightly off center, and balance it with a cluster on the other side.
- Mark the nail or hook positions, remove the templates, then hang.
If you're redecorating a bedroom or shared space as the graduate moves on, our piece on playroom wall art that grows with kids covers planning a wall that changes with its owner, and the same logic applies here.
Canvas or paper: choosing the print
The print you choose changes how the whole display feels.
Canvas has a soft, textured, frameless look. It suits a single hero image, such as a cap-and-gown portrait or a timeline collage, and it doesn't need glass, so there's no glare under party lights. Gallery-wrap canvas has image wrapped around the sides for a finished edge, while a slim-profile canvas sits closer to the wall.
Paper is the better choice for a framed gallery wall, for black-and-white portraits and for detailed images. Fine art paper gives richer depth, and matte paper reduces reflections. If you aren't sure which surface to pick, our guide to matte or glossy photo prints explains how each finish behaves in different light.

Sizing a canvas for an entryway
There's no official standard here, so use common sense: the piece should be readable from about 6 to 8 feet away, and it should be bigger than any frame around it. A large portrait-orientation canvas works well beside a front door, while a wide landscape one suits a mantel or the wall behind a dessert table. Measure the wall, cut a paper template, and tape it up before ordering.
Check the photo before you print
Large prints need sharp files. Phone photos can look great on canvas if the original is the full-resolution version, not a screenshot or a social media download. Our guide on how to print phone photos walks through checking resolution and choosing between home, store and canvas printing.
Mounting photos without damaging walls or photos
This is the part that goes wrong most often, so test first.
Reusable putty
Reusable mounting putty is handy for lightweight paper items. The manufacturer's data sheet for Loctite Eco FUN-TAK advises testing absorbent surfaces, or an inconspicuous spot, for 24 hours, because it may stain some papers and flat painted surfaces. Do that test the day before the party, not the morning of.
Tape and strips on painted walls
The Drywall Finishing Council explains that pressure-sensitive tape can pull paint or drywall paper off if it's left too long or the paint isn't fully cured, and it recommends testing the surface first. It also notes that the damage generally comes from mismatched adhesion between tape, paint and drywall finish, not a faulty product. In practice: if you've repainted recently, use nails or hooks, or wait. Rental walls are another good reason to test a hidden spot first.
Heavy canvas
A large canvas should hang on a proper hook or wall anchor rated for its weight, not on putty. Check the weight of your piece, then match the hardware to it and to your wall type.
Lights and décor: keep it safe
String lights make a display glow, but keep the setup simple. The University of Richmond's decorating guidelines say decorative lights should be plugged directly into wall outlets, cords shouldn't run through doors or windows, and lights should be unplugged at the end of each day. Those are campus fire-safety rules, but they're sensible at home as well. Avoid chaining many strands together, keep cords out of walkways, and keep paper photos clear of anything that gets hot.
Protecting the original photos
If your display includes old prints that can't be replaced, such as a grandparent's photo or a baby picture, handle them differently from the party copies.
The National Archives recommends that, for permanent preservation, originals be kept in boxes while high-quality scans or copies are used for display. For anything you do frame, it advises UV-filtering glass or acrylic and keeping the piece away from direct daylight and fluorescent light. It also suggests hinging originals to a backing mat with Japanese paper hinges and wheat starch paste, or using inert plastic or paper corners that hold the photo without adhesive.
The Library of Congress adds that preservation matting and framing should use chemically stable materials such as cotton rag or purified lignin-free board that has passed the Photographic Activity Test.
The easy rule: scan the original at high resolution, print the scan, and put the print on the wall. The original goes back in the box.
Our perspective: one big piece beats fifty small ones
We see the same pattern with graduation orders. Families gather dozens of photos, then try to show them all at once, and the display ends up looking busy and nothing stands out. Our advice is to choose one image the graduate truly loves, print it large, and let it be the piece that stays on the wall long after the party.
Canvas is our favorite choice for that piece because it needs no glass and looks finished the moment it comes out of the box. Paper prints are the better partner for a framed wall or for artwork with fine detail, and a mixed wall of both can look wonderful. Whatever you pick, check the preview before you order, so you see how your crop, edges and proportions will look. A photo that looks fine on a phone screen can lose the graduate's face to a badly placed edge.
And give yourself time. Printing and shipping take days, not hours, so order well before the date and leave room for a reprint if something is off.
— Diego
Turn your favorite photo into a canvas or print
If you want the anchor piece without the guesswork, Photocanvas prints your photos and digital art on handcrafted canvas or premium art paper. You upload your image, choose a size, finish and edge style (including gallery-wrap or slim-profile canvas, or matte and fine art paper), and see a live preview before you order. Our prints are packed carefully and shipped securely, and our customer care team stands behind a satisfaction guarantee.
For a party, a good starting set is one large canvas for the entryway, plus a few paper prints for the memory table or a framed wall at home. Start at our canvas and paper print pages and upload your best graduation photo.
Graduation photo gifts that keep the memories
A display idea can also be a gift. Some that work well:
- A canvas of the graduate's best portrait: it's ready to hang in a first apartment or dorm, and it doesn't need a frame.
- A timeline print: a collage of one photo per school year, designed as a single piece.
- A set of matching paper prints: three or four images in matching frames, one for each stage of school.
- A print of the graduate's own work: an art or design student's piece, a photo from a trip, or a team shot. Artists can order prints of their own work, too.
- A memory box plus a print: the originals go into an archival box, and a high-quality copy goes on the wall. That's the same split the National Archives recommends for display versus storage.
If you're giving a gift, ask a parent or roommate for the file or the wall size ahead of time. A canvas that's too big for a dorm wall is a common mistake.
A simple timeline for planning
You don't need a calendar of exact dates, just an order of work.
- Four to six weeks before: collect photos and scans, and decide the story.
- Three to four weeks before: choose the hero image, check resolution and order prints.
- One to two weeks before: test putty or strips on a hidden wall spot, buy hooks and frames, and sketch the layout.
- Two days before: lay everything out on the floor or table first, then hang.
- Party day: check lights, plug them directly into outlets and keep cords clear of walkways.
- After the party: move the best pieces to a permanent wall and put the originals in storage.
FAQ
What is the best way to display graduation photos at a party?
Place one large focal piece near the entrance and use smaller groups near the food table and the graduate's seat. Arrange the photos by school stage so the display reads like a story. Add a memory table for keepsakes, and keep the lighting simple.
How do I hang a graduation photo wall without damaging paint?
Test your putty or removable strips on a hidden spot first, since some products can stain papers or painted surfaces, and tape can pull paint if the wall isn't fully cured. For anything heavy, such as a large canvas, use a hook or anchor rated for its weight. Nails are often safer than adhesive on freshly painted walls.
Is a canvas a good choice for a graduation photo?
Yes, especially for one hero image. A canvas has a frameless, textured look and no glass glare, so it works in bright party spaces and later in a home or dorm. For detailed or black-and-white portraits, a framed paper print can be the better choice.
Should I display the original photos?
It's better not to, especially for old or irreplaceable prints. The National Archives recommends keeping originals in boxes and using high-quality copies for display. If you do frame an original, use UV-filtering glass or acrylic and keep it out of direct light.
How many photos should I include?
There's no fixed number, but fewer, better photos read more clearly than a crowded wall. Aim for a handful per school stage and one hero image for each. Use a slideshow for the rest.
Sources
- Party City: DIY Graduation Photo Displays
- Better Homes & Gardens: Gallery Wall Ideas
- National Archives: Displaying family archives
- Library of Congress: Preservation Guidelines for Matting and Framing
- Loctite Eco FUN-TAK data sheet
- Drywall Finishing Council: Pressure-sensitive tape failures
- University of Richmond: Holiday Decorating Guidelines